DIY Eurorack Power Distribution Build Guide
This is the build guide for the Eurorack Power Distribution Kit
Table of Contents
- Resources
- About the DIY Eurorack Power Supply
- Tools Needed
- BOM (Bill of Materials)
- Build Steps
1. Resources
2. About the DIY Eurorack Power Distribution Board
This is a simple, easy to build way to distribute power to multiple modules. While it takes time to assemble, it is not terribly difficult to do so.
3. DIY Electronics Tools
- Soldering Iron: Cheap
or Nice
- Solder
- Soldering Tip Cleaner
- Micro Shears
- A Multi-Meter
- Safety Glasses
4. BOM
,
| Category | Part | Quantity |
|---|---|---|
| Capacitor | .1uF | 3 |
| Capacitor | 1uF Electrolytic Caps | 2 |
| Diode | 1N4007 | 2 |
| Diode | RED LED | 3 |
| Hardware | 2x8 pin Shrouded Header | 15 |
| Regulator | 7805 or this one for higher 5VmA, but the pinout is different and the legs are bigger. | 1 |
| Resistor | 1K | 2 |
| Resistor | 470 Ohm | 1 |
| Optional | A way to connect this to your power supply | 1 |
| Optional | 4 PIN MTA Power Header | 1 |
| Optional | Cable with 4 pin Female Ends | 2 |
5. Build Steps

- As with most of our builds, you want to start building "low to high," meaning the "shorter" items first. In this case, that means the 470 ohm resistor at R2.
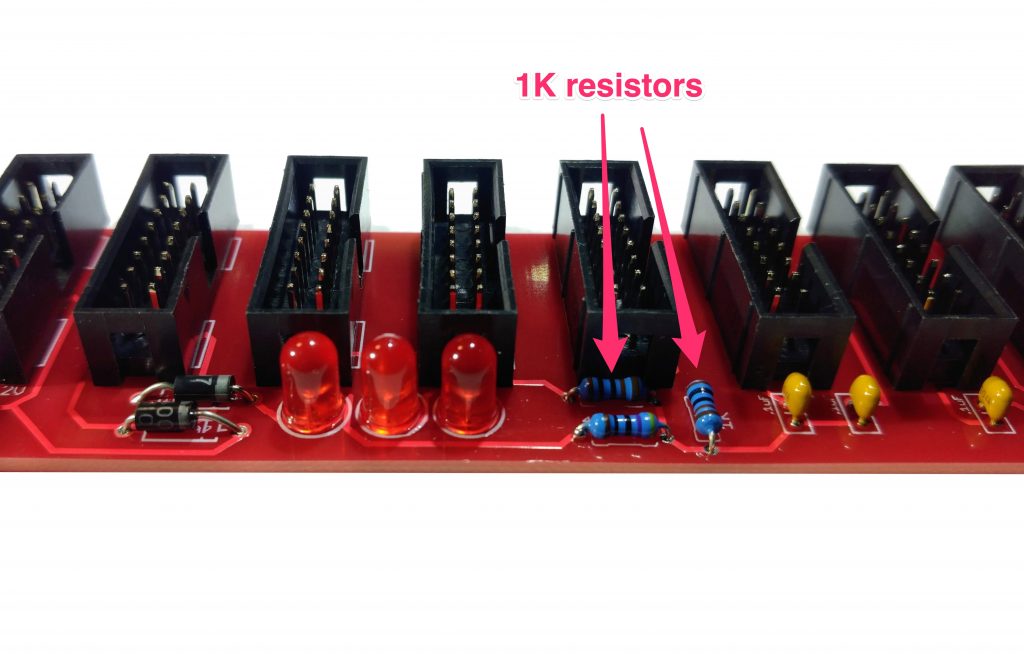
- Next we'll put in the two 1k Resistors.
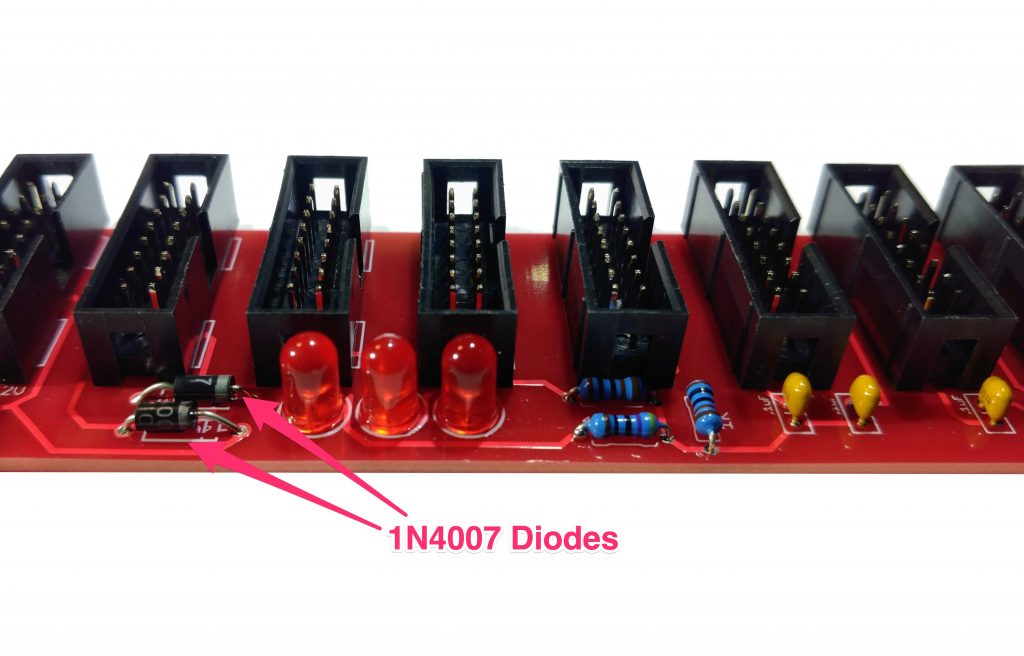
- At this point we add the 1N4007 Diodes. These diodes are used in conjunction with the 5V regulator, and we use them because they only allow voltage to flow one way. Mind the orientation of these diodes.
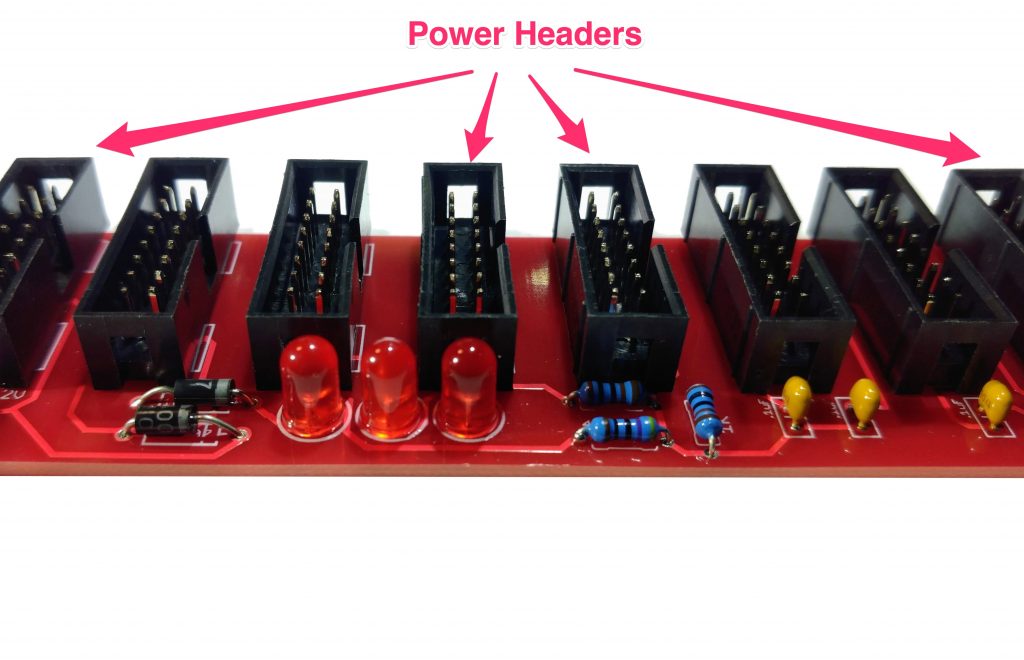
- Next put in the 15 2x8 Power Headers. Align them with the silk screen so that the locked header is in the right place, and then carefully flip the PCB over. As you solder, very gently press down on the PCB to ensure that the headers are flush with the PCB.
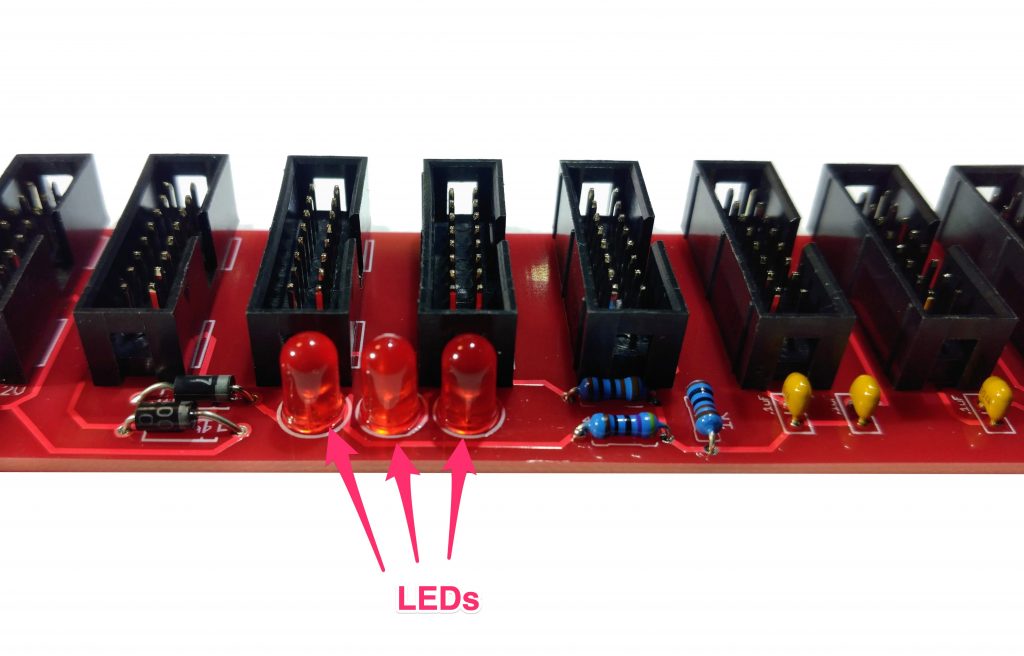
- Next put in the LEDs. These are optional, but light up in correspondence with the +12V, -12V, and +5V. Be sure to mind the polarity of the LEDs. The longer leg of the LED marks the "round" side of the LED.
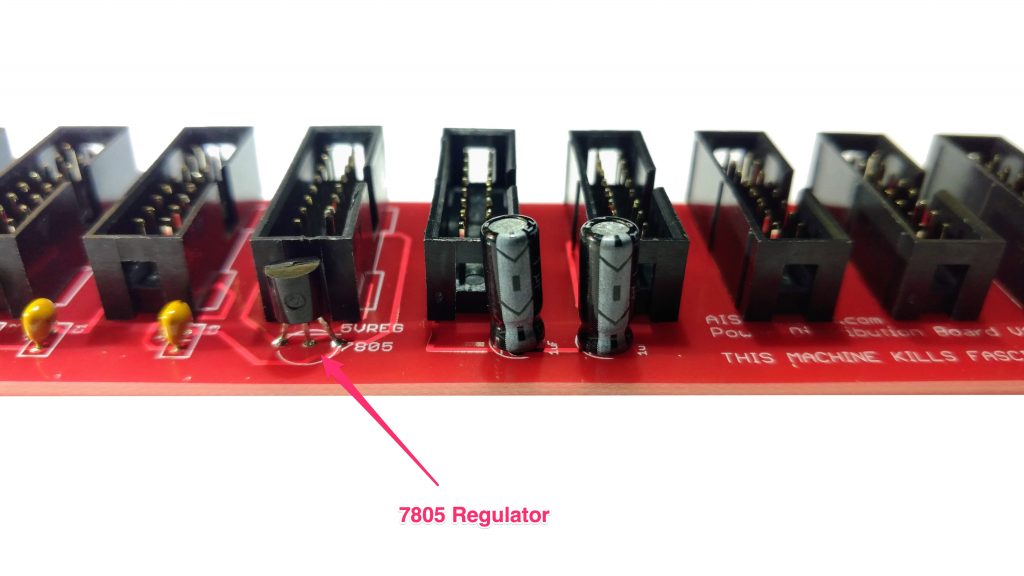
- At this time we can put in the 7805 Regulator. The orientation must match the silkscreen. The 7805 draws power from the +12V rail coming in from the power supply, and regulates that down to +5V.
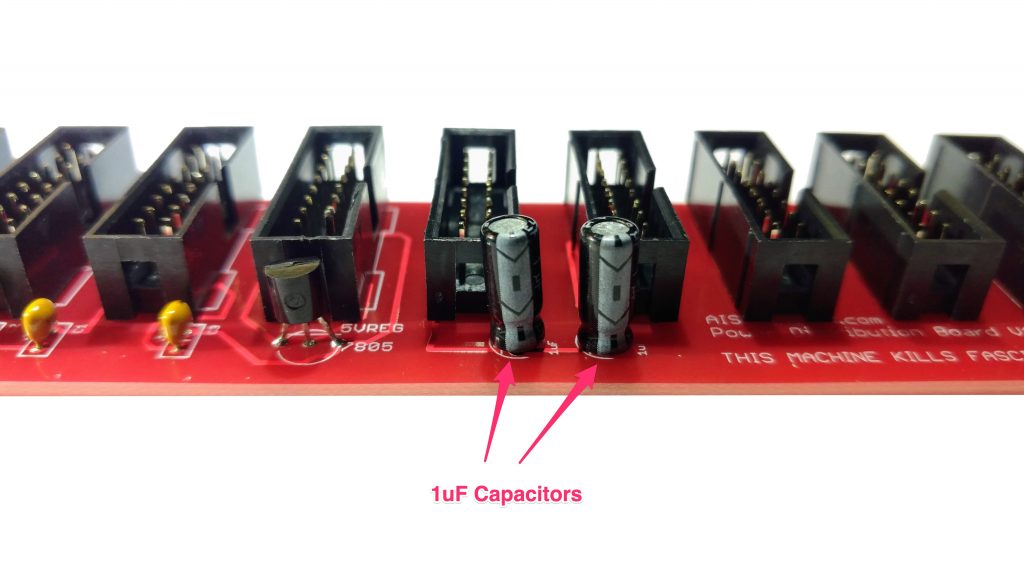
- With that done, you can put in the two 1uF caps. Make sure they are oriented the correct way. These are here to smooth out the 5V power rail.
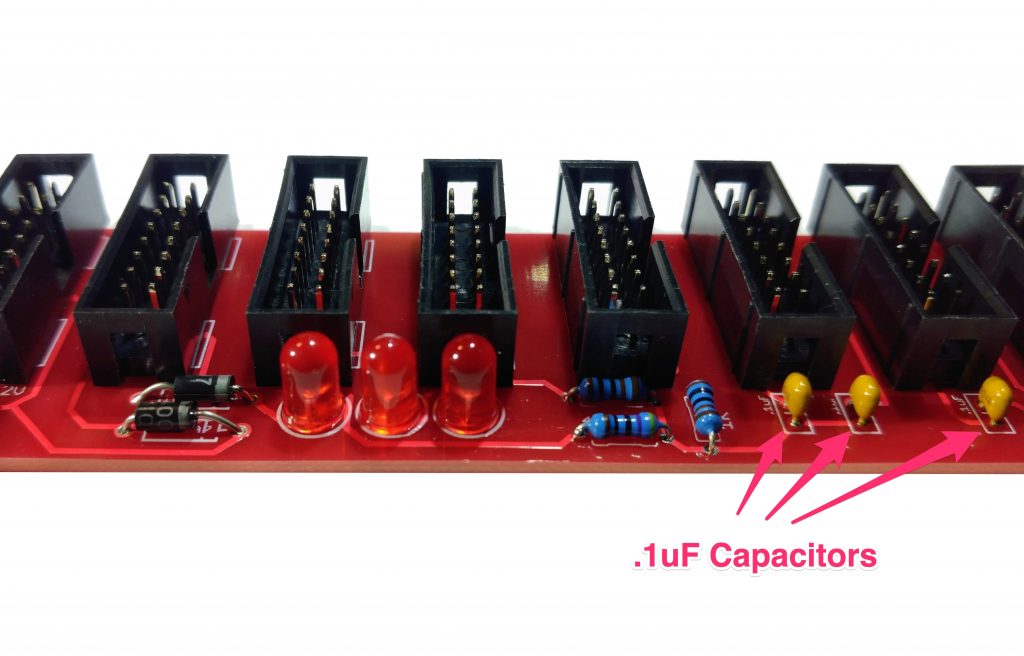
- Finally we add the three .1uF caps.
- Before we test with power, perform a quick continuity test. See the above or the build guide video. Ensure there is no continuity between Ground, +12v, +5v, and -12V and each other.
- If there is no continuity, then it is a good time to test. Put on some safety goggles, and get your power supply and connect the two.
- All three LEDs should light.
- Hook the black lead of your multimeter to ground, and the red leg to +12V, you should read around +12 V. Next move the red lead to the -V pad, you should read around -12V. Then move the red lead to +5V, it should read about 5V. It can be off by a little bit, as long as it is within a volt or so.
- Share your build on Facebook and Instagram!
- If you want to learn more about managing power, read this Eurorack Power Guide!
- If you are having any issues at all, please contact us at: https://aisynthesis.com/contact/.
DIY MOTM Cables
To make your own MTA Cable you will need the following:
2 x AMP #640445-4, pcb mount locking post header connector, .156" center (these solder to the PCBs)
- Allied #512-3452, 1+ $0.11
- Mouser #571-6404454, 1-9 $0.11, 10-99 $0.09
2 x AMP #640426-4 MTA-156 locking receptacle for cable mount, 18 gauge wire
- Allied #512-3359, 1+ $0.20
- Mouser #571-640-4264, 1-9 $0.20, 10-99 $0.16
2x AMP #640551-4 MTA-156 receptacle dust cover (technically optional but I always use them)
- Allied #512-3407, 1+ $0.17
- Mouser #571-6405514, 1-9 $0.12, 10-99 $0.11
18 GA wire